Greed versus SketchUp!

Ugh! I’ve spent most of the evening battling myself and Google SketchUp! The two of us are formidable foes.

The challenge is this: Shapeways wants a super-clean mesh before they’ll attempt to print. That means normals all have to point the same way, and no hidden faces or lines.

Sadly, SketchUp likes nothing better than creating hidden faces and lines — it works best like this. When you see the slick demos online, rest assured that the resulting model is unprintable.

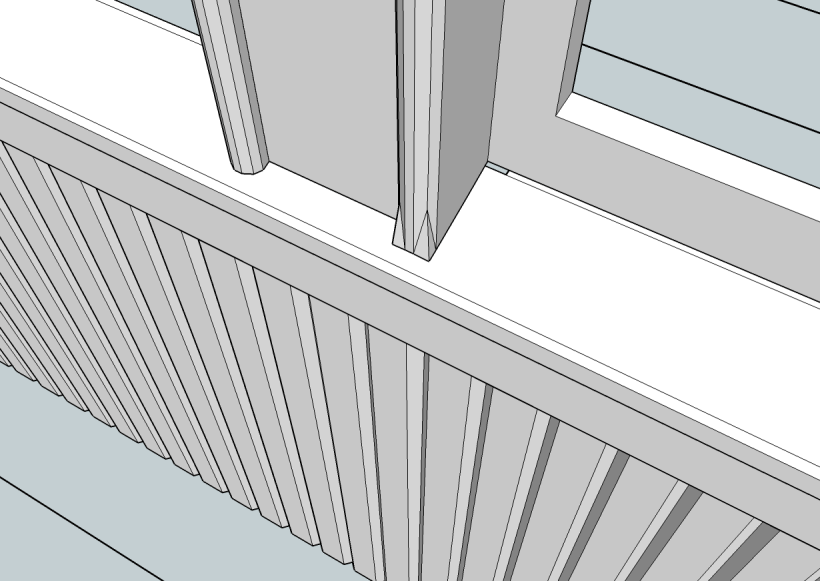
Doubly sadly, when I started the model, I was seduced by the powerful gestural language that the tool provides, and quickly did things like extruding rounded shapes for the window frames (who knows how they’ll resolve on the printer!), and sloping the window sill so the rain doesn’t run into the car.

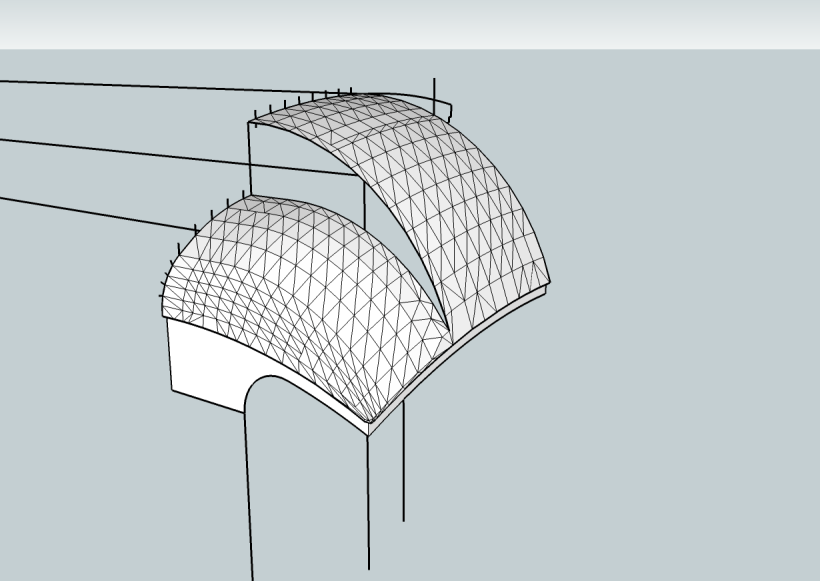
So now, we need to make those two surfaces meet cleanly. Should be a simple matter of using the “Intersect” tool in SketchUp, right? Well no, because SketchUp doesn’t like working at the small scale I’m working in at all. I should have realized this was going to be a problem when SketchUp wouldn’t even let me create an arc .015″ in diameter, and I had to draw segments myself.

I probably wasted an hour trying to get it to fill in the odd shape at the foot of the window frames. Finally I gave up, and here is my solution: I drew a rectangle at the foot of the window frame, then bent the bottom of the frame so it fills the rectangle. Voila, the shape on the window sill is easy to fill because it’s all big squares, and the inside will have no hanging surfaces. I haven’t tried to upload yet, but I have high hopes that this will work for me.

Sides and roof modeled in Sketchup

Well, I’ve learned a ton about Google SketchUp since starting on this project. Today’s lesson was about groups. Now in every other drawing program I’ve ever used, groups were of little actual utility because in order to edit the elements of the group, you had to break the group and recombine the elements. In SketchUp, on the other hand, you can edit the group in place, which is a huge boon when you’re dealing with groups of thousands of elements. For much of the past couple of weeks as I’ve been modeling, I’ve been struggling with SketchUp choosing the wrong element when I’m trying to pick things: it often wants to choose an element behind the one I’m interested in. I can now see that combining elements into groups and editing the group is the way to defeat this annoyance. The more I use it, the more I like this tool.

Anyway, as you can see, I’ve not modeled the ends yet, and there are a many details to go, but the car is starting to take shape.

Starting on a passenger car

Well, you may as well know I’ve started on my next Proto:87 project. It is going to be the passenger car here, which I sadly know little about except that it ran on the Pembroke Southern behind my locomotive. I believe it was a GTR car, about 60 feet long, but the number and all other information seem to be lost in time.

Now for the approach. When I was in Houten, I got a chance to handle some models made with 3d printing by Shapeways. This got me thinking about the best way to make the roof, which, as you can see, does not present any useful flat surfaces to make construction easy. So, I’ve been busy modeling this part in Google Sketchup with a mind to getting it made for me. Then, I thought, well why stop there? So the whole sides, ends and roof are going to get printed. I’m going to do the underframe in wood because it would have been unpainted wood on the prototype.

Exciting times! Here is the quarter roof after I figured out how to do the compound curve. I spent a number of evenings figuring out Google Sketchup before finally getting this together. The trick turned out (for me) to be to draw longitudinal contour lines in AutoCad. Then I transferred this drawing to Sketchup and moved the lines so they lined up with their locations on the transverse section (that’s what the ticks are on the far edge). There is a whole lot of work involved in stitching the adjacent lines together to form a surface, and I guess I could then go and smooth all the lines. I’m happy enough with the triangles; they should be small enough and even enough to be hard to discern in the finished product.

Proto:87 International Meet

The meet was a huge success! Many thanks to Dave Doe for putting it together, and to Rail 2009 for being such gracious hosts.

I’ve posted a few photos on flickr. I spent most of the weekend demonstrating scratchbuilding techniques in styrene, and delivered two clinics.

Here are the highlights:

  • There were 50 registrants from nine countries
  • 13 Proto:87 layouts were in attendance, including a Fremo setup of over 40 metres in length (about a third of their total length).
  • There were seven construction and demo tables

Overall, I think everyone learned something and had fun in the process.

Proto:87 International Meet

The details are still being ironed out, but Dave Doe is putting together another meet in the Netherlands (the last one was 10 years ago). Here is the website where you can find more official information: www.rail.nl. However, here is the preliminary lineup:

Confirmed Clinics:

  • John Wright: the reasoning, development and building of Federal street.
  • Ed McCamey: wheel and rail standards and their interaction.
  • Iain Rice: in search of realism
  • Rene Gourley: Measure Once, Cut Twice: Simple techniques improve your model-building while saving time.
  • Rene Gourley: Measure Never, Cut Twice: Use your computer to improve your model-building while saving time.
  • Others are in negotiation

Confirmed Layouts:

  • Fremo:87 Glottertalbahn
  • Rue de la glacière
  • ClubProto :Entre P.O et PLM
  • Obbekær
  • Quai 87 / Kaai 87
  • Bodesmeer
  • Lilleskog 1927
  • Special guest layout Pempoul (actually 7mm narrow gauge, but the one layout in MRJ of the past year I really wanted to see)

Confirmed Demos:

  • Rene Gourley: I’ll be demoing ideas from my clinics
  • Ed: building track
  • John Wright
  • Emmanuel NOUAILLIER: buildings
  • Edwin Hoender Lokwerkstatt: DRG (HO pur)

For Trade:

  • Protoscale ( Huet trains)
  • and others

The caboose is finished!

Finally, I finished the caboose. It was down to the wire to finish it before the big train show this weekend, but here you have it. Overally, I’m pretty happy with it.

Next up? Well, I’ve got a couple of non-P87 models under way, and I reckon I’d better finish them. Then, I’m hoping to start the big basement reno sometime this winter, which will pave the way for (drum roll please) the layout!

Stay tuned.

Caboose roof

Here you go, the roof is just about finished; there’s a little weathering to do, and perhaps a little patina on the smoke jack.

I thought for a long time about the covering. I think this was likely canvas, although I don’t have any proof. Once I’d decided it was canvas, I spent weeks looking for real evidence as to what a well-maintained canvas roof should look like. I’ve seen loads of models with tissue paper on the roof to represent canvas texture, as well as seams between sheets. I found a number of references and pictures on the web to restoration efforts involving canvas roofs, and found that these were universally made in one big piece of canvas. Once the canvas was stretched over the roof, it was then painted. So, are the seams on other models bogus? If you paint canvas, I wouldn’t expect much texture to remain, especially in HO scale.

The boards leading from the ladder to the running board are another supposition. If the roof was indeed canvas, they would have wanted to protect it from brakemen’s feet. However, in the good side view we have, I can’t see any evidence of a normal platform here.

The running boards are plastic, of course. You don’t paint running boards because it makes them slick. So, they are finished in my recipe for well-maintained wood: Humbrol matt 63 (sand colour) base coat followed by some dry-brushed matt 170 (dark brown) then some dry-brushed light grey, and finally a wash of dark grey. Like the underframe, I may start doing these in wood.

When the inevitable aerial photograph shows up shortly after the model is completed, I’ll probably wind up redoing much of the roof. But here it is for now.

Next step: I need to cut the bottom out of the cupola now that it’s glued down, and create an interior for the cupola at least. I hadn’t planned to make an interior for this model, but there are so many windows in the cupola, I don’t think I can get away with that.

Lettering still wet

I just finished doing the lettering. This is a dry transfer, which I had made by All-Out Graphics here in North Vancouver. The artwork was my own, of course. It’s not cheap for the short runs that I need, but I much prefer working with dry transfers, and they do a nice job.

We’re definitely down to the short stokes now! I cut a new weight this evening, and I expect I’ll install that along with the doors tomorrow. I’ll get my son to mix the epoxy for the weight — gotta get them hooked early.

Time to Refocus

It’s certainly been a while since my last post. Why?

When I saw him in Chilliwack this summer, Andrew Hutchinson noted that I seem to be doing more painting than modeling these days. That’s certainly part of it. In 2007 I resolved to make a painting a week, and this pushed the model trains even further into stolen minutes instead of dedicated hours. Painting, I find, doesn’t lend itself to those stolen moments. Progress on the caboose, while it continued, got painfully slow.

But progress did continue, and the caboose has come a long way since I posted the shot of the steps in (gulp) January. One change that happened is the photo studio went away when my modelling desk had to move to make way for the new baby. At about the same time, we got a digital SLR, which really wants a macro lens to take good photos up close, and so, photography became much more complicated, and posts even regarding painfully slow progress, have evaporated.

“Painfully slow” doesn’t sound like much fun, now that I reflect on it. “Slow” seems, to be a hallmark of my modelling: everything takes much longer than I hope. Because I’m modeling the Canada Atlantic, everything is scratchbuilt, starting from the trucks on up. Now, I like as much instant gratification as the next guy, and this is not instant by any stretch of the imagination. I would truly love to be able to shake the box and have a finely detailed model pop out at the other end.

To be honest, I’ve thought about changing hobbies in the past months. But I’ve finally decided that it is not this hobby that’s the problem, but the duel between hobbies. Which one should I choose? The painting gets loads of recognition among my non-rail friends, but really, I’m never going to be a great painter, and I may as well admit that now. The trains on the other hand, are appreciated by nobody, but I really enjoy the problem-solving aspects of building them.

So, I’ve put away the paints for now. There will be a day when I can afford time to spend on two past-times, but for today, with two young children at home, I should stick to one — one that fits into stolen minutes.

To combat the scratchbuilding blues, I’ve shaken a couple of boxes recently to run on a friend’s layout. I’m doing these in strict contravention to my usual rule to focus on one model at a time. I’ve got to admit, it’s loads of fun to make such quick progress on a model for once; they’re not Proto:87, but I’ll post a couple of photos here when they’re done all the same. They’ve successfully broken me out of my funk, and I’m more jazzed about the hobby than I have been in ages.

The caboose should be finished in a few weeks, and I’ll post some updated photos soon. Look for more in the weeks and months ahead. I’m back!

Caboose steps

I hemmed and hawed for a while before finally getting down to making the steps. My initial thought was I would etch the steps as one of my origami etchings. Then, when the etchings didn’t work out, I figured it might be easiest to bend the two stringers from a single length of brass strip.

Finally, I settled on a more typical approach. After bending up the stringers on a simple jig, I placed them in two holes the correct distance apart. I soldered the top step on first flat against the block into which the two holes had been drilled. Then, I put the other ends of the stringers in the block and soldered the bottom step on, soldering them perpendicular to the block.

After all that pondering, it turned out to be a good deal easier to solder the steps up precisely. They wound up taking only about a few minutes each, and so, I made an extra.

To install, I had the most success when I blu-tacked a spacer strip to the side sill, and then held the steps against the spacer. The stringers are glued to the back of the sills, and I’m still pondering whether I should reinforce them with some sort of pinning.