Caboose mockup

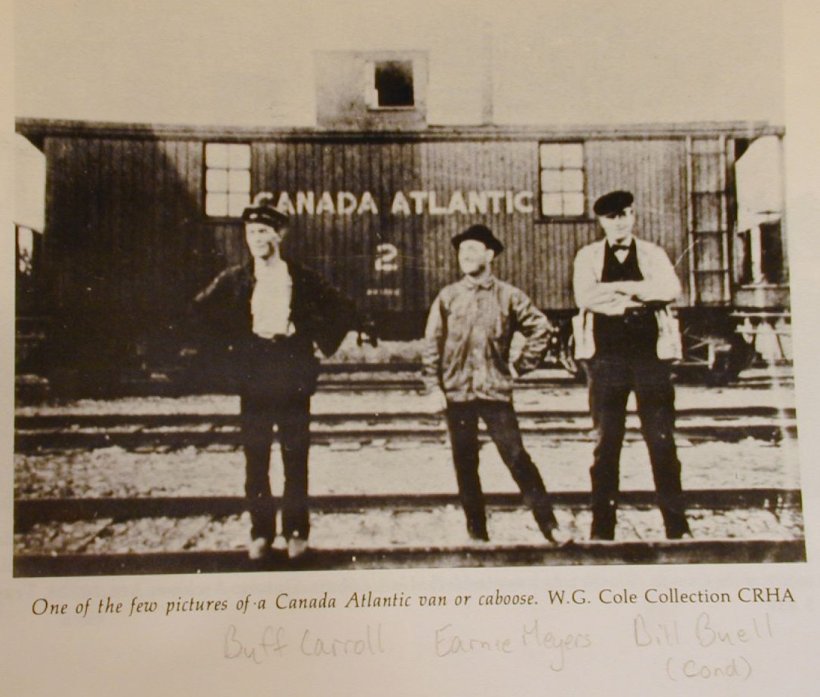
The drawing is mostly finished now. For fifteen years, I’d been looking at that picture and thinking the cupola was centred, and the windows were equidistant from the ends. I’m so fortunate to have a side-on view: it’s rare for Canada Atlantic freight equipment.
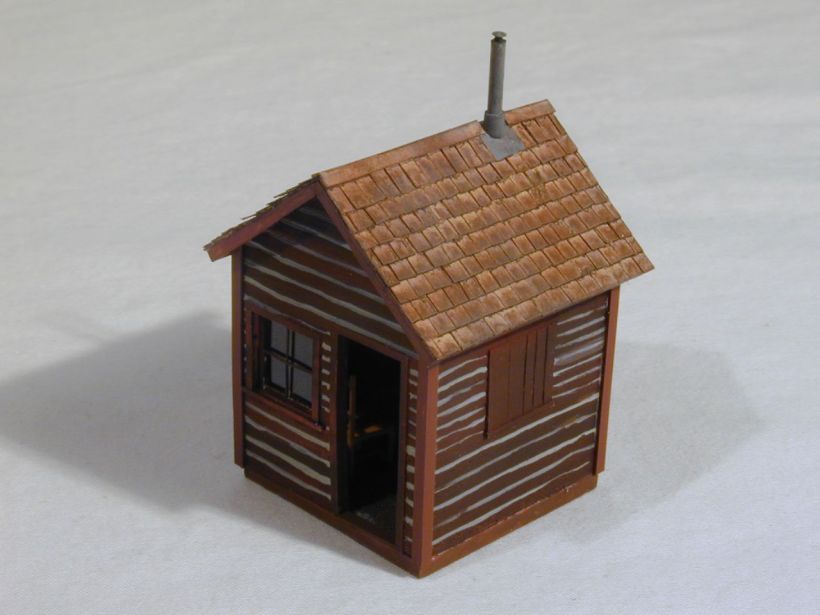
When I built the locomotive, I got about half-way and thought, “Gee I could have verified the look of this thing with a cardboard mockup before I started.” Now, I’m doing this with everything. The mockup takes only minutes to make, and could save hours of embarrassment later. Even the little crossing shack got a mockup.
As a side bonus, I can let my two-year old play with them when I’m finished with them. They last for about five minutes in his hands – about five minutes more than the real model would last!
So now that I have the mockup, it still looks a little long to me. I can lay it right over the photograph and it’s perfect, but it still doesn’t look right.

The next project

I’m waiting for the weather to fine up so I can store stuff outside while I renovate the layout room. In the meantime, I’m tackling the Canada Atlantic’s standard caboose. Well at least I think it was standard: #2 and #4 looked the same, and I’ve not seen any photos of #3 or any of the others.

I started the drawing last night. It appears from scaling against the wheel that this was a 33′ vehicle, which sounds plausible. Doing a drawing is easy when you have a square view like this, although there is a possibility it’s foreshortened by the camera angle, so I might make the body a little taller.

One interesting feature is the repair in the side with a different type of siding. It looks like they replaced the original wide boards with the later beaded siding that we also see on the 6000 series boxcars.

General plans are to make the body out of styrene, use the same etched truck construction as on the locomotive, and etch the windows and perhaps the cupola, and end railings. The end railings are not particularly complicated, but I could make them very robust by etching them.

The first entry on Proto:87.org

The main problem with the old Proto:87.org was that there was never enough fresh content. New P:87 products only come out so often! Techniques are just as rare. So, the site generally looked moribund, and it was, especially after 2001.

So, now I have a blog. Here, I will be describing my own modeling projects, which are all P:87. I might stretch out to buildings and general layout construction, but at least there will be new content.

Caboose windows

I always find that casting and etching are a little bit like Christmas: I can never wait to try out the new part that I have produced so magically. Here, I’ve soldered together the two halves of the main windows. They are an unusual design, having a two-pane upper sash and four panes below.

The etching took forever. I guess the etchant has been sitting in my shed for about four winters, and that is probably too long to sit in a shed. So, it worked very very slowly, but eventually it worked. My technique leaves a little to be desired, and I can never count on anything that is supposed to be half-etched. I got lucky with the doors (I’ll show them another day), but less lucky with the steps, which dropped a couple of parts into the bottom of the etchant. Anyway, it is still a magical process, and I couldn’t create windows as consistent as these with styrene, so I guess I’m pretty happy.

I was sorely tempted to fold and solder up the truck sideframes as well, but I think I can leave them until tomorrow.